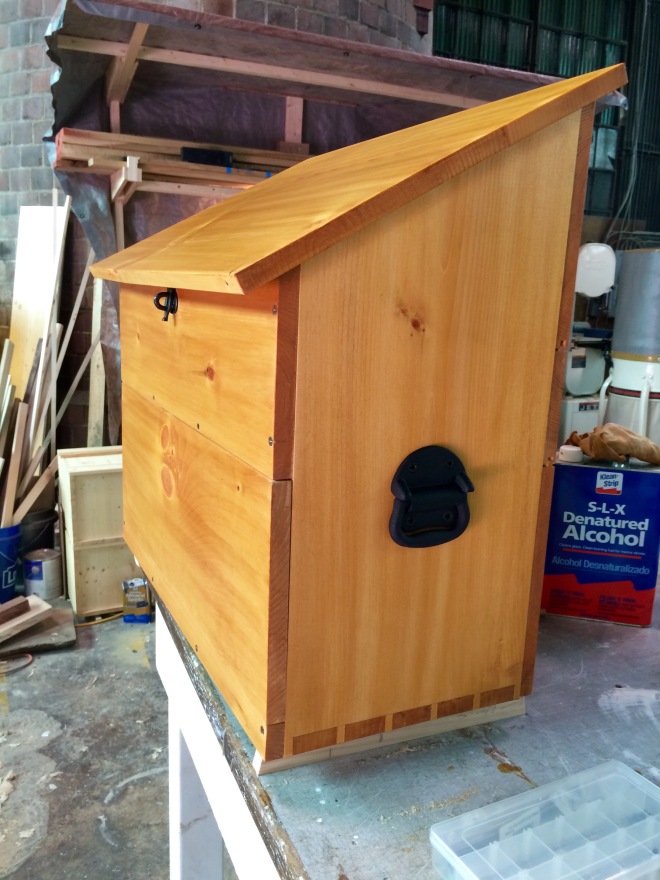
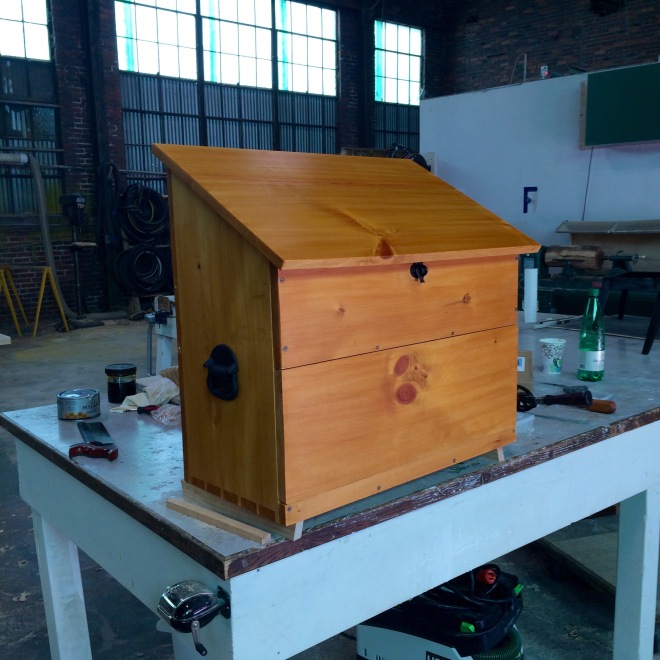
At this point the chest is finished. Here are some pics of the final result, with all the hardware in place and the finish on the chest.
The chest got 2 coats of danish oil. The next day I rubbed on some garnet shellac, followed by wax.
Now, on to the commentary…
The chest turned out better than I expected. I was unhappy with the quality of my work at several points along the way, in the construction of this piece; however, the end result ended up being quite beautiful once cleaned up and finished.
Having said that, it is worth sharing some mistakes and lessons I learned along the way:
The good
- Hand-cut dadoes (at least not stopped dadoes) are easy as long as you pay attention to what you are doing. This was my first time to make this particular joint and it went really well and the dado was tight and easy to fit (the floor of the top compartment is essentially a shelf whose front is obscured by the top half of the chest’s front).
- My hand-cut dovetails are getting better and better. (At least my through-dovetails).
- This chest is indeed easy to build, as Mr. Schwarz advertised. Two or 3 days in the shop for most people should be enough, exclusive of painting/finishing, etc…
- My first time to place hinges went much more smoothly than it should have. The pessimist in me fears it will never be so easy ever again…
- Very proud to say that no power tools were used in making this project.
The bad:
- If you look at the bottom edge of the side, you can see that I laid out my tails on the bottom board and the pins on the sides, which is the opposite of what I intended. Ultimately it will make no real difference (that joint carries only half the weight of the tools inside, and the dovetails were done well). The downside is that it looks like a funny finger joint. Oh well.
- I underestimated how wet the wood was. I should have stickered the boards and let them dry a little before starting. (In reality this would have been impossible. In all honesty, however, even if I had the option at the time, I would have barreled along into the project without properly accounting for the dampness of this wood. This was a mistake I would have made even if I was in full control of the situation when we started the project.) Pine doesn’t move a whole lot, compared to most woods I use, but I was astonished at how much movement I have seen in this piece so far. Most of the construction was done in February. Five months later my tongue and groove joints on the back are almost (but not quite) at their limits. Also some of the wood has threatened to split, in ways that weren’t apparent back in February.
- There are some fairly epic depths of tear-out in a few places. Partly due to the wood itself (lots of switching grain directions), but mainly due to my own impatience and lack of paying attention. In the end I opted to accept some of the tear-out; this was meant to be a working chest, not a show-piece, and I needed to finish things and move ahead to the next project. However, it was a good lesson for the future. Discipline is important.
- The chest looks nice, but in retrospect I would have used more blonde and less garnet shellac. This is a taste issue, but it does annoy me.
A fun and useful build. I recommend it to anyone, even if you don’t have need of a tool-chest. I had a lady come by the shop and ask if it was a toy-box. I suppose it is, in a way.
Tomorrow I move my man-toys into the chest, and begin a new project…


I’ve found that hand cut dados are generally easier to make than using a table saw. At that, I’ve never made them on a panel wider than 16 inches, but the technique is still the same.
Nice job on the tool chest BTW.
Bill
LikeLike